




Salon appointments are every six weeks. Roots become visible at about four. That two-week gap is one of the more quietly annoying facts of having coloured hair, and it’s the entire reason the root touch-up category exists.
These products are cosmetic rather than corrective — they sit on the hair and wash out at the next shampoo. That’s their limitation and also their appeal: nothing permanent, nothing that can go wrong, ninety seconds in front of a mirror. Where they fit alongside proper colour maintenance is covered in the hair colour care guide.
The four formats
Spray
An aerosol tinted spray, applied from a distance to the parting and hairline. Fastest to apply and best for covering a large area — a whole parting, or diffuse grey across the crown.
Best for: speed, wide coverage, thinning hair where you can see scalp.
Watch out for: overspray onto the scalp and forehead, and the tendency to look flat if you use too much.
Powder
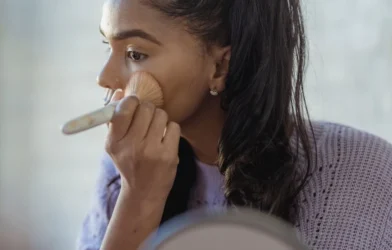
A pressed or loose pigment applied with a small brush or sponge. The most natural-looking finish of the four, because you can build it gradually and blend the edges.
Best for: precision, a soft result, small areas around the parting and temples.
Watch out for: transfer onto pillowcases and collars if you over-apply.
Stick or crayon
A wax-based stick you draw directly onto individual strands. Excellent for the specific problem of a handful of stubborn grey hairs at the temples.
Best for: individual greys, hairline precision.
Watch out for: waxiness and stiffness if used over a large area.
Mascara-style wand
A small brush in a tube, like a very small mascara. Good middle ground between precision and speed.
Best for: the front hairline and edges, which is where roots show most.

Shade matching
The rule that saves most people: match your roots, not your lengths. If you have highlights or balayage, your ends are lighter than your natural base, and matching the ends produces a visible pale patch at the crown that looks worse than the grey did.
Go slightly lighter rather than slightly darker if you’re between shades. Too dark reads as an obvious block of colour; too light just looks like a subtle highlight.
Test on a small section at the back of your head first, in daylight rather than bathroom lighting. Bathroom lighting is a liar and always has been.
For grey coverage specifically, aim between your natural colour and your dyed colour. Pure grey has no pigment and takes tinted product differently from coloured hair — it often ends up slightly warmer than expected.
Application, step by step
Start with completely dry, styled hair. Product on damp hair goes patchy and can run.
Part your hair the way you normally wear it. That parting is where the eye goes and where the product needs to be.
For spray: hold about 20cm away. Short bursts. Spray, assess, spray again — building up in layers rather than one heavy pass. Cover your forehead with your hand or a tissue.
For powder: tap excess off the brush before it touches your hair. Press rather than sweep, working from the root outward. Blend the edges with a clean finger.
For stick or wand: stroke down the individual strand from root to about two centimetres down. Don’t paint the scalp.
Then let it set for a minute before touching anything. And take a second parting, a centimetre from the first, to check you haven’t left an obvious edge — the demarcation line is the giveaway that turns a good touch-up into an obvious one.
Stopping transfer
The main complaint about these products, and mostly solvable.
Use less. Almost all transfer is caused by excess product sitting on the surface rather than adhering.
Set it with a light mist of hairspray held at a distance. This makes a substantial difference and hardly anyone does it.
Let it dry fully before putting on a coat, a scarf or a light-coloured top.
Avoid it entirely on rainy days if you can — most formulas are water-soluble and a proper downpour will find that out. This is a real consideration in Britain and worth planning around before a wedding or an interview.
Who these suit
Anyone stretching the gap between appointments. The core use case, and it works.
People going grey gradually. Particularly good for covering the first scattered greys without committing to a full colour routine.
Thinning hair. Tinted powders and sprays reduce the contrast between scalp and hair, which makes hair look denser. This is a genuinely effective visual trick and often the real reason people buy them.
Between-wash emergencies. A wedding, an interview, a photo.
Anyone avoiding chemical colour — pregnancy, sensitivity, or simply preference.
The limits
It washes out. Every time, without exception. This is a same-day fix, not a solution.
It doesn’t work well on very long regrowth. Once you’re past about two centimetres, you’re colouring a stripe rather than a root line and it starts to look like what it is.
It can look flat under direct sunlight or a camera flash, because the pigment doesn’t reflect light the way hair does.
And it does nothing for tone. If the problem is that your colour has gone brassy or faded rather than that your roots are showing, you need purple shampoo or a colour depositing conditioner instead — different problem, different product.
When to stop patching and do something proper
If you’re reaching for the spray every single day, the maintenance interval isn’t working and it’s cheaper in time and money to shift your colour strategy.
Options: move to semi permanent hair colour, which fades softly instead of leaving a hard line. Or move to a technique with deliberately soft regrowth — balayage appointments stretch to twelve or sixteen weeks precisely because there’s no line to maintain, and the balayage aftercare guide covers what that involves.







Comments are closed